Privacy Policy for http://design-interiorgreat.blogspot.com/

If you require any more information or have any questions about our privacy policy, please feel free to contact us by email at dengkolpeyok@gmail.com.

At http://design-interiorgreat.blogspot.com/, the privacy of our visitors is of extreme importance to us. This privacy policy document outlines the types of personal information is received and collected by http://design-interiorgreat.blogspot.com/ and how it is used.

Log Files
Like many other Web sites, http://design-interiorgreat.blogspot.com/ makes use of log files. The information inside the log files includes internet protocol ( IP ) addresses, type of browser, Internet Service Provider ( ISP ), date/time stamp, referring/exit pages, and number of clicks to analyze trends, administer the site, track user�s movement around the site, and gather demographic information. IP addresses, and other such information are not linked to any information that is personally identifiable.

Cookies and Web Beacons
http://design-interiorgreat.blogspot.com/ does use cookies to store information about visitors preferences, record user-specific information on which pages the user access or visit, customize Web page content based on visitors browser type or other information that the visitor sends via their browser.

DoubleClick DART Cookie

.:: Google, as a third party vendor, uses cookies to serve ads on http://design-interiorgreat.blogspot.com/.
.:: Google's use of the DART cookie enables it to serve ads to your users based on their visit to http://design-interiorgreat.blogspot.com/ and other sites on the Internet.
.:: Users may opt out of the use of the DART cookie by visiting the Google ad and content network privacy policy at the following URL - http://www.google.com/privacy_ads.html

Some of our advertising partners may use cookies and web beacons on our site. Our advertising partners include .......
Google Adsense
Commission Junction
Widget Bucks
Adbrite
Clickbank
Azoogle
Chitika
Linkshare
Amazon
Kontera

These third-party ad servers or ad networks use technology to the advertisements and links that appear on http://design-interiorgreat.blogspot.com/ send directly to your browsers. They automatically receive your IP address when this occurs. Other technologies ( such as cookies, JavaScript, or Web Beacons ) may also be used by the third-party ad networks to measure the effectiveness of their advertisements and / or to personalize the advertising content that you see.

http://design-interiorgreat.blogspot.com/ has no access to or control over these cookies that are used by third-party advertisers.

You should consult the respective privacy policies of these third-party ad servers for more detailed information on their practices as well as for instructions about how to opt-out of certain practices. http://design-interiorgreat.blogspot.com/'s privacy policy does not apply to, and we cannot control the activities of, such other advertisers or web sites.

If you wish to disable cookies, you may do so through your individual browser options. More detailed information about cookie management with specific web browsers can be found at the browsers' respective websites.

Showing posts with label bathroom. Show all posts

Patterned Powder Rooms


I suppose I've been on something of a bathroom kick recently. After putting the finishing touches on my master bath last month, I painted my upstairs' guest bath turquoise last week. Next up on my bathroom "to decorate" list is the powder room. What I love about decorating powder rooms is how you can really go all out. Since powder rooms are separated and closed off from the rest of your house, you don't have to worry too much about matching it to the rest of your decor or simply getting sick of it (after all, how much time do you really spend in your powder room?). Unencumbered by any sort of obligation to make it work with the rest of your home, a powder room is a great opportunity to try out crazy color schemes, bold patterns, etc. And, from a practical standpoint, a powder room's small size also equates to fewer dollars spent (particularly important if you're working with a pricier wallpaper) and an easier time redoing everything should you find yourself regretting your leap of faith.

As I've been contemplating the direction I want to take my powder room over the past six months or so, I've also been saving inspiration photos of particularly inspiring bathrooms. When looking back over these shots, the one thing that's immediately apparent is that I have a thing for patterned wallpaper in powder rooms. The wallpaper used in the powder room by Jonathan Berger above is Lysette in Magenta by China Seas and I love the bright pattern and how well it works with the white fixtures. The hot pink is also a great reference back to the main floor of the house, which incorporates hot pink throughout.

Meg Braff

If the wallpapers play a starring role in these powder rooms, then the vanity mirrors are without question the award-winning supporting actresses and actors. In this bathroom from Meg Braff, the organic pattern of the wallpaper (Potalla Background in Jungle Green by Alan Campbell) is nicely set-off by the geometric greek key on the mirror. Just like white woodwork against dark walls, a white mirror creates contrast and even architectural interest where there was none before. There are so many incredible mirrors available on the market today that can be hard to pick a direction but the best advice I can give you is not to limit yourself to mirrors that are expressly for bathrooms. For a roundup of my favorite mirrors, see HERE.

Joe Nahem

This powder room from Joe Nahem is almost too pretty for words, but the Barbara Barry mirrored vanity shifts the mood from girly to glamorous. Describing this wallcovering as "wallpaper" is probably an insult -- it is in fact hand-painted and embroidered silk wallcovering from Fromental. A serious investment, to be sure, but it's undeniably gorgeous.

Jeffers Design Group out of San Francisco is consistently one of my favorite design teams. Their work is colorful, dramatic and unique, but there's enough traditional elements to keep it from feeling completely off-the-wall -- and that's exactly how I would describe this powder room. I'm a huge fan of wall-mounted faucets, especially when the sink is deck-mounted. I also love the variety of materials used in this room -- nothing matches but it still all works together. And that, in my opinion, is the hallmark of a design professional.

Alessandra Branca

I actually have a number of powder rooms in my inspiration files that have a wonderful "tented" trompe l'oeil effect, and I love the effect in powder rooms that are particularly cramped and/or have low ceilings. Instead of trying to hide the lack of (horizontal or vertical) space, the small size is celebrated. Since my powder room is tiny and tucked underneath the stairs, I contemplated going this route myself.

Thom Filicia

I love how Thom took the wallpaper (Cavern Home's Blackbird Wallpaper) and ran it all the way up and over the ceiling. Not only does it stretch the ceiling height, but it also helps enhance the fantasy-like quality of the paper. To keep the room from being overwhelmed, however, Thom left the wall behind the vanity white (also a great cost-savings measure) and kept the fixtures very sleek and modern.

Monique Lhuillier

Designer Monique Lhuillier's home is still one of my favorite spreads in Elle Decor (see HERE). It's a gorgeous example of how a predominately neutral palette (most of the house is decorated in black, white and grays) can still be incredibly glamorous, dramatic and feminine -- and Monique's powder room is a great example of this. The custom wallpaper is a KWID Imperial Trellis look-a-like from Astek. KWID's classic print is not available in black and white, but you can find it in a tone-on-tone black as well as charcoal and white.

Canadian House & Home

There's something about yellow and white that just makes me happy and it's the perfect palette for a bathroom with little or no natural light. The wallpaper is by Telio, which appears to be available in Canada only. If you're looking for a similar look from a resource available in the use, try Farrow and Ball, which has a great selection of yellow wallpaper in a variety of patterns. If you'd like to see this entire home (which is just as darling as its powder room would suggest), I did a post on it last summer you can view HERE.

Miles Redd

The genius of Miles Redd is that he takes very traditional design elements -- even "granny-ish" elements -- and makes them feel young, hip and new. I absolutely love the sink/faucet in this bathroom, but of course it's Scalamadre "Zebra" wallpaper that really steals the show.

Kristen Buckingham

Okay so I've cheated here a bit: the wallcovering here isn't actually wallpaper, it's one of my favorite fabrics ("Domino" print by Duralee), but if you're looking for a wallpaper in a similar pattern, try the Lydford Pagoda in Black on White by China Seas. I think I would have instinctively stuck with the black and white theme and gone with a white mirror in this bathroom, but I think the antique brass mirror really adds a wonderfully unexpected (and traditional) touch.

So when it came time to select the wallpaper that would go in my powder room I really agonized over the decision -- which is pretty atypical for me. Normally, I select paint colors, fabrics and even furniture relatively quickly. I tend to love things on sight and if the price is right, I go for it. But wallpaper admittedly intimidates me quite a bit. After all, it's not nearly as easy to change as paint and the price can often make a quick change prohibitive anyway.

Last June I ran a poll on wallpaper options. And, while I still love both patterns (and agree with the majority's choice of the Banswara pattern), I decided to go a slightly different direction, primarily because I wanted the powder room to tie in with the adjacent family room and entryway. After much internal debate and hand-wringing, I've decided to go with a classic: Summer Palace by Osborne & Little (shown above). Not only is the print in my beloved blue and white, but it's in a classic chinoiserie pagoda pattern that will stand the test of time. And as for my fear of getting sick of it? Well, I had a nearly identical print (though in a more muted palette of cream and champagne) on the walls of my childhood bedroom. I figure if I still like the initial choice that I made at 16, then it should stand the test of time.

And so, with Summer Palace as a jumping off point for my inspiration, this is my vision for the powder room:

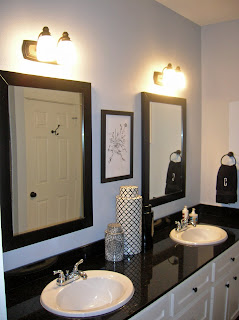
I would love to swap out my existing pedestal sink (similar to the Kohler one shown above) for something a bit sleeker and more "me", but that quite simply isn't in the budget right now. Besides, it's hard to justify ripping out a brand-new sink just because I'm not in love with it, especially when there are far more pressing items on my design "to do" list. So the plan is to stick with the existing sink and hardware and spend the bulk of my budget on the two items that should make the most impact: the wallpaper and the mirror (Williams-Sonoma Home's Hampstead mirror in white, which Dave gave to me for Christmas). Since the pedestal sink is seriously short on storage space, the plan is to pick up a small storage unit like the Newbury etagere from Restoration Hardware ($259) to store necessary sundries...and to display a few pretties as well.

While I'd love to invest in a few hand towels from Leontine Linens, I'm quite sure that, with hand towels starting at $90 a piece, I would never, ever allow anyone to actually wipe their hands with them. And so, in the interest of not completely freaking out my guests, I'll be picking up a few hand towels from Williams-Sonoma Home embroidered with pagodas. Even better, they're currently on sale for $18 a piece. Because all powder rooms should be gorgeously scented, I'd use one of Delirium & Co.'s Blue Period candles (shown is Delirium & Co.'s Blue Absinthe candle ($38)). Finally, for art, I'd hang Anne Harwell's Blue and White Ginger Jar print, which I picked up over the holidays but hadn't found a home for yet.

Weekend Update: Going Turquoise


This past weekend Dave and I decided to perk up our dreary (and windowless) guest bathroom with a bright punch of color. I've been itching to go really bold with paint in the new house and decided this secondary bath would be the perfect spot for some serious experimentation. I selected Capri Seas from Benjamin Moore, which is a classic turquoise, a perfect balance between blue and green. All in all, I like how the paint really brightens the small bathroom, especially the interior shower-area which was dangerously dark. Nevertheless, such a bold color does take some getting used to and I'm hoping the overall effect is more beachy than kiddie...but the great thing about paint is that it's a choice easily changed should I decide in a few months that it's just too much. For now though, I think it's fun and I love how it really makes the white trim and vanity pop (despite them being pretty builder-basic).

Last time I used Benjamin Moore, I went with their zero-VOC paint (Natura), but this time selected their low-VOC version (Ben) just to see if I could tell any difference. And I did. The Aura paint is all but odorless and, while the Ben paint is significantly less toxic-smelling than regular latex paint, it still had a noticeably unpleasant odor -- not a good thing when you're working in a small, confined space without any ventilation.

We also updated the vanity area by swapping out the large, frameless mirror with a slick white version of the Hutton Mirror from Restoration Hardware. We used the same mirrors (but in the espresso stain) in our last house (see HERE) and I can't say good enough things about them. Not only are they extremely well-made and easy to install (the mounting hardware even comes with a built-in leveler), but these mirrors are also well-priced.

The Bathroom That Blogging Built

This weekend marked the completion of the final decorative touches to our master bathroom and I couldn't be happier with the finished results. What excites me even more though is that this is the first room that I feel like I can really cross off my list and declare "done" in the new house (as much as any room I ever design can be deemed complete as I'm always tweaking things). It's also the first room that I can really say is exactly as I had hoped it would be as the majority of my house is still incomplete. In honor of the occasion, I thought I'd give you a virtual tour of the room, from top to bottom.

When I last updated you on my master bathroom, I was debating which light fixture to switch out the small, completely inadequate, ceiling light with. Well, after months of contemplating my options, I decided to go with: Neither! Ultimately, I felt that if I was actually that torn about which light to pick, I should just hold out until I found one that was exactly what I was looking for. And I'm so glad I waited.

A few weeks ago I spied this fixture over at Aesthetic Oiseau and knew instantly that it would be a perfect fit for my master bath. As a major bonus, it was also well under what I had budgeted for a light fixture (I bought the smallest version, the three-light fixture). And, while my ceilings wouldn't allow me much room for hanging, I do think the hanging pendant brings a coziness to the space that a flushmount simply couldn't have.


With all the hard tile (and all the white and gray!) in the bathroom, I wanted to bring in some softness and pattern in the form of fabric. Obviously, in a bathroom draperies aren't particularly practical, so after reading about Jenny's gorgeous pelmet boxes over at Little Green Notebook a few months ago, I decided to try making my own pelmet box to fit around our large, very bare window over the bathtub.

Because the bathroom will obviously see a lot of moisture over the years, I decided that constructing my pelmet box out of foam core was probably not the best move (I could just image it starting to droop after a few months of showering!). So I decided to tear apart the plywood box that one of our mirrors was shipped in and reuse the plywood as the frame for the pelmet box. It took Dave and I several hours (and several attempts) before we got a product that I was happy with, but overall the project was fairly simple. We hung the pelmet with two L-brackets,which we hung just a few inches from the top on either side so they're now completely invisible.

The fabric is Windsor Smith's Archipelago fabric in Haze. Normally this fabric is to-the-trade-only, but I managed to score it (at a pretty decent discount) from Avid-Home (which I heard about via Paloma over at La Dolce Vita). I love the fabric so much that I'm thinking about using the mist colorway for draperies in the master bedroom.


Beth has touted the virtues of this trellis foot stool (from, of all places, JCPenney's) several times on her blog Chinoiserie Chic. And, once it went on sale, I decided to pick up my own for the vanity in our bathroom, intending to recover the seat in the same Windsor Smith fabric as the pelmet box. When the stool arrived, I was pleasantly surprised by its sturdiness, but wished the base were in a bronze instead of a brushed gold (which is actually quite nice, I just didn't want to introduce another metal into the room). So I decided to pick up some spray-paint at Lowe's and give it a quick coating of bronze paint. I did a light coat to allow for some of the gold to come through, which I think gives the metal a more authentic, bronze look.

And finally, I decided to cover the majority of the open floor with a rug because (1) those tiles are dangerously slippery in the morning, (2) I love the look of a real rug and not just a bathmat in a bathroom, and (3) our pristine white grout is a major b*tch to keep clean. I chose the steel zig zag rug from Madeline Weinrib because I wanted to stick to the same neutral color palette, but go with a bold pattern that would really make a statement. As a bonus, the fact that the rug is a cotton flatweave should help it stand up to the dampness.

So many thanks to all the bloggers mentioned who inspired specific aspects of this design as well as to all the other bloggers who have inspired me daily and helped me to better define my own sense of style. It's a great feeling to finally have an entire room more or less complete (even if it is just a bathroom). Next on my list: finishing up the living room.

Mood Board Monday: Glamorous Bathroom

German Silver Bowfront Chest (Wisteria; $2499)

Today is Mood Board Monday over at Pewter + Sage. The challenge this week was to design a room around one of two gorgeous chests from Wisteria. I selected the German Silver Bowfront Chest for its gorgeous hand-applied silver-leaf finish and its charming glass hardware.

I decided to do something a bit different this time by repurposing this chest as a bathroom vanity. I love the look of proper furniture in a bathroom and I thought this chest would perfectly suite a petite city bathroom for a glamorous city gal. It's feminine and shapely, with a graceful presence that would befit a young, single gal in the Big City who is short on space but long on style. As for budget, let's pretend our client has a rather deep pocketbook (after all, it's much more fun to fantasize without too many restrictions, isn't it?).


Despite the strong traditional feeling of the piece, I wanted the setting to still feel modern. Inspired by Jenna Lyons' gorgeous master bathroom (featured last year in domino), I thought I'd capitalize on a major trend in interior design this year and paint the walls a stunning matte black wall. A traditional stand-alone bathtub with a deep charcoal exterior would also enhance the mood.

Canadian House & Home, April 2008

What I love about using black as the dominant color in a bathroom is that it's just so unexpected, though in truth the result can be just as soothing as the ubiquitous all-white bathroom. Since the shape and styling of the chest means that I can't go totally modern, I'd add some very traditional bathroom elements (white subway tile, nickel hardware) to play up the vintage feeling of the chest and to create some tension against the very modern black walls. Something along the lines of this gorgeous vintage-inspired black and white bathroom that was featured last year in Canadian House & Home.


I'd start by painting the walls a true black -- I like Benjamin Moore's Black if you're looking for a black without a hint of green or blue. I'd tile the walls around the bathtub in a classic white subway tile with some narrow black trim. My major splurge on this project would be the gorgeous cast iron free-standing tub from Waterworks in a deep charcoal metallic finish. Yes, it's pricey, but it would make the room.

For the vanity's top, I'd use a small piece of gorgeous Nero Marquina marble. The classic Spanish marble's strong veining of white and silver will help tie in the vanity's silver finish with the classic black and white basketweave floor. I'd keep the sink a simple white porcelain undermount and use classic nickel fixtures. To mix things up, I'd add a mirror and vanity lighting with Chinoiserie influences. To up the glam factor, overhead lighting would come in the form of a petite flushmount seeded glass and silver fixture -- just the kind of piece you'd imagine stumbling on at a Parisian flea market. Next to the tub, I'd keep a small side table for books, towels or bath products that could also do double duty as a stool. The silver leaf finish will speak to the finish on the vanity and help tie the two areas of the bathroom together. Finally, I'd introduce another pattern into the room by covering the window in a classic roman shade made out of this white and silvery gray geometric fabric.

Source list (clockwise, from top left): 1. Hampstead Mirror from Williams-Sonoma Home ($505.75). 2. Double Chinoiserie Bath Light from Circa Lighting ($378). 3. Vintage Widespread Sink Set from Restoration Hardware ($429). 4. Michael S. Smith signature tile from Ann Sacks. 5. Michael S. Smith mosaic basketweave tile from Ann Sacks. 6. Nero Marquina marble from Ann Sacks. 7. Candide Cast Iron Freestanding Oval Bathtub from Waterworks ($9,945). 8. Winsdor Smith Archipelago fabric (in Mist) from Avid Home ($49/yd). 9. Small Paris Flea Market Flush Mount with Seeded Glass Trim from Circa Lighting ($420). 10. Silver Leaf Five Leg Table from Ethan Allen ($359).

Be sure to check out all the other great design ideas for this gorgeous chest HERE.

Finishing Touches on the Master Bathroom


Up until a week or two ago, the very thought of launching into another painting project at our house left Dave and I exhausted. After all, the memories of our painting marathon back in August were just too fresh. Now though that summer has turned into fall, I find myself with some renewed energy to focus on home improvement projects around the house and over the weekend I managed to talk Dave into repainting our master bath from the boring-but-pleasant builder basic beige to a lovely, rich medium-tone gray (Lamp Room Gray to be exact) that ties in perfectly with our blue-gray master bedroom.

And so, with the UT-OU {hook 'em horns!} and then UF-Arkansas {Go Gators!} football games in the background, Dave and I managed to knock out the painting in just a few hours. While the "before" and "after" photos aren't terribly different, I do think the bluer gray works nicely with the white ceramic tiles and white Silestone countertops. In addition to the new paint color, we've also swapped out the hardware with Restoration Hardware's vintage collection, which features a lovely combination of frosted glass and oil-rubbed bronze.


For a bit of personality, I also hung some antique Japanese woodblock prints (which I scored from Fuji Arts on the cheap years ago) that had been sitting in my closet. Frames are simple Pottery Barn gallery frames that I've used (and reused) for years.

My next project is going to be to replace the existing light fixture with something a tad less boring. I'd like to do something with some serious personality, but because of the height of the ceiling (9 feet), the fixture needs to be either flush mount or extend no lower than 6" or so. Right now, I'm debating between this Jonathan Adler flush mount or this Morovian star pendant. Since our house is currently tied 1-1 on which to go with, I thought I'd let you the readers cast the deciding vote.


Budget Fixes for Ugly Bathrooms

One of my favorite features on mega-blog Apartment Therapy is its House Tours, which showcase the homes of its readers. I like these tours because they're usually of homes you don't see in design magazines. The often space-challenged homes are rarely decorated by professionals and, more often than not, are reflective of their owners' (or renters') limited budgets. Rather than inhibiting the owners' creativity, I've often found these constraints can result in some seriously impressive problem solving.

This week I was particularly impressed by Nicole and Colin's "streamlined salvage" DC home. Bizarre (and kind of annoyingly alliterative) dubbing of their style aside, I loved the couple's solution to a common problem many homeowners face: ugly bath tile. Unable to undertake a massive bathroom renovation, Nicole and Colin found a shower curtain that included a similar tone to their pinky-yellow tile and allowed them to bring a second color (the grey-blue paint) into the space to help tone down the tile. The result is both retro and pretty. In fact, I almost like the tile.

If you're facing a similar problem of your own, the homeowners' shower curtain (the Dobby-stripe shower curtain from Restoration Hardware) is available in a variety of colorways and, like any patterned fabric, is a great jumping off point for a room design -- just stay within the fabric's color palette and you'll be set! Random aside: I actually have the same curtain in Ash hanging in my upstairs bathroom and I love it.

Seeing Nicole and Colin's house got me thinking, what else can you do (on a budget) to spruce up an outdated, ugly bathroom without actually having to resort to pulling up tile and starting over?

Distract yourself with color: As with Nicole and Colin's bathroom, the right paint color can rescue even the saddest bathroom tiles. And, since the amount of wall space in most bathrooms is tiny, you won't even need much paint to completely transform the space. The oatmeal-colored tiles in the bathroom pictured above could easily read as dingy or just plain boring (they don't even have that fresh and clean feeling that white tiles would have) when paired with the wrong paint color. Max Chamberlain's (AT's resident color expert) decision to paint the walls coral manages to make the tile choice deliberate rather than simply what the homeowners inherited.

Cover 'em up: So far, my suggestions have focused on keeping the existing tile as-is and trying to make it work with color and fabric. But what if your tile really is that hideous? Since replacing the tile would be out of our imaginary budget and painting tile can have some seriously nasty effects, why not just cover it up? Available from 2Jane, Mibo's "tile tattoos" are an inexpensive and impermanent (perfect for the renter!) way to disguise ugly or or even just jazz up boring tile. The "tile tattoos" are really just opaque stickers, cut to fit standard 4" or 6"-square tiles or even standard subway tiles. Prices range for $16/set of 6 to $18/set of 6. Their options range from retro to Scandinavian to Tuscan and I think most of them are adorable.

Go for the grout: While you may not be changing out the tile in your bathroom, you may want to consider the grout. Dirty, greasy grout can make even nice looking tile less appealing. With a little bleach and elbow grease, you can get most grout looking almost like new. Doityourself has a very thorough post on cleaning grout yourself here. If you've scrubbed and scrubbed and your grout still looks like Hades (or if you've inherited the ill-advised predilection for light tile and dark grout of a prior owner's), you can always try your hand at restaining the grout to the color of your choice.

Don't forget the finishing touches: As in the rest of your house, sometimes it's the little details that can make a bathroom go from bleh to great. A word of advice though: avoid any sort of themes. Having a shell-shaped soap dish won't make you feel like you're in Tahiti any more than a zebra bath mat will make you feel like you're on safari. If you can stand to wade through all the "Bear necessities" and "Jumpin' Dolphins" bath collections, Target has some nice budget-friendly options (like Isaac Mizrahi's collection, pictured above, which looks very Jonathan Adler to me -- speaking of, his druggest bath accessories are to die for, but less budget-friendly).

Of course, bathroom accessories don't have to be made specifically for the bathroom. I love the idea of keeping cotton balls, q-tips or hair ties in one of these beautiful oak lidded cups by the British company (with Swedish roots) ISAK. And of course, I love the idea of a coordinating birch wood tray to corral all the cups (I'm pretty anal like that).

If you're budget allows for it, I really adore almost everything India Rose does for the bath. Her amara bathmat ($58), argyle shower curtain ($100), and pintuck shower curtain ($110) are all pictured above.

Does anyone else have any other suggestions for how to fix up an ugly or outdated bathroom without major renovations? If so, please share the wealth and leave your words of wisdom in a comment below.

How To Remove A Large Bathroom Mirror

A few weeks back I posted a quick tour of my master bedroom and bathroom and Jamie left a comment asking for more details on how we removed the large unframed mirrors and replaced them with more updated framed mirrors. In light of the rather comical way we ended up going about removing the mirrors (and the after shots that I'm actually pretty proud of), I thought the answer merited its own post.

As an attorney (albeit one completely uneducated in personal liability), I do feel a duty to warn the general public that the way we went about removing these mirrors was, while in keeping with all the best HGTV has to offer, dangerous. After all, we're talking about breaking glass here. Accordingly, the general counsel (me) here at Odi et Amo advises you to consult a professional and, should you elect to undertake this project without the aid of such professional, proceed with caution at your own risk.

With that out of the way, let's get down to business. When undertaking any home improvement project, it's imperative that you outfit yourself accordingly:


This is what my husband wore the day we removed the giant mirror in our guest bathroom. Because you'll be dealing with a mirror that may (either intentionally or unintentionally) break, it's important to wear long clothing (samurai print optional), close-toed shoes, gloves and protective eye gear (which I promise Dave did wear, but is not modeling for us here). Because we had to break our mirror due to its weight, Dave also wore his Bose noise-cancelling earphones to reduce any hearing damage -- I suspect you could get a similar effect with plain old earplugs, or even earmuffs.

Now that you're looking professional, you can move on to the task at hand. You'll first need to determine how much glue is holding the mirror in place. If there's a lot of glue, you may need a crowbar (in which case you'll need to tape the mirror in a cross-hatch pattern first to reduce breakage). With the mirrors in both our bathrooms, there appeared to be little, if any, glue in place so it was mostly just a matter of unscrewing the brackets (easily done with a screwdriver). If our mirrors had been scaled normally, we would have simply unscrewed the mirrors, removed them, and replaced them with the mirrors of our choice -- unfortunately, the course of home improvement projects never does run smooth.


For us, the snag came in the sheer size and weight of our mirrors. The mirror in our upstairs' bathroom was approximately 7 feet long and 3 feet high.
I'm not sure how that works out in terms of weight, but I'd imagine several hundred pounds as the combined force of David and I couldn't so much as lift the mirror an inch, let alone lift it off the wall, onto the ground, down the stairs and out the door. Since we're both rather impatient and disinclined to seek outside assistance (even when required), we pushed on undeterred and decided we would just break the mirror into pieces and transport those pieces outside for disposal. As when you have to resort to a crowbar to pry a mirror off the wall, whenever you decide to break a large mirror up into smaller pieces, it is wise (a relative term here) to first tape the mirror -- we used blue painters' tape -- in a cross-hatch pattern to prevent splintering and help the mirror break up into larger pieces. I'm not familiar with the science of it, but trust me, it makes a difference.

Of course, when breaking a 21 square-foot mirror, it's best to keep pets and children as far away from the chaos as possible (our animals were all safely in the backyard). Dave also broke the mirrors with the doors closed to avoid any pieces unintentionally flying into the hallways. After a break or two, Dave and I would stop and clean up the pieces as we went. All told, it took us several hours to break the mirror in the guest bathroom (and another afternoon a few weekends later to break the two mirrors in the master bath). We ended up storing the mirror shards in the boxes that the new mirrors came in for disposal (particularly convenient since those boxes were lined in Styrofoam, thus reducing the likelihood any jagged edge would poke through).

A word of warning: While I am not particularly superstitious, Dave and I did break these mirrors just a few weeks before Hurricane Ike hit Houston and Lehman's bankruptcy hit the nation. While I'd posit the classic statistical maxim that "correlation does not equal causation", I feel compelled to confess this unfortunate bit of timing lest further mirror breaking by well-intentioned DIYers triggers some sort of apocalypse.

But let's move on from such depressing topics and take a look at the guest bathroom "after" shots, which were well worth a few minor cuts and some sore muscles (though quite obviously not hurricanes or economic meltdowns):


The mirrors we replaced our contractor-grade mirror with are the Hutton mirrors (size small) from Restoration Hardware and are the same mirrors we used in our master bath. The hanging equipment and instructions included by RH are very detailed and easy to follow and hanging these up was no big deal. Also, since RH has been running pretty steep discounts and shopping incentives almost continuously since last summer, you can probably score them at a substantial discount (we gout ours for $100 off). At the same time we did this mirror project, we also painted the bathroom from a dull beige to a light blue-gray (Benjamin Moore's Feather Gray). Bath towels are just basic black towels from Pottery Barn -- a hint from Martha actually, who argues that darker towels and linens are great for guests as they hide stains and look fresher longer. The shower curtain is the Dobby-Stripe shower curtain in ash from Restoration Hardware. The canisters on the counter and the large canvas print of the stack of art books are all from Pottery Barn's summer 2008 collection and the artwork (entitled "Bird in E Minor") between the mirrors is via Wall Blank.

Related Posts Plugin for WordPress, Blogger...

Blog Archive